Manual Check 🚗
Make sure you have done this part: Write your tracking plan 📑.
In this part you will get a grasp on how GAUnit works.
You will export network traffic recorded from the Chrome console in a HAR file. Then, you will use GAUnit to check if tracking plan is OK.
Note
In this tutorial, we use Chrome, but you could use any tool to get a HAR file: Firefox Developer Tool, proxies, etc.
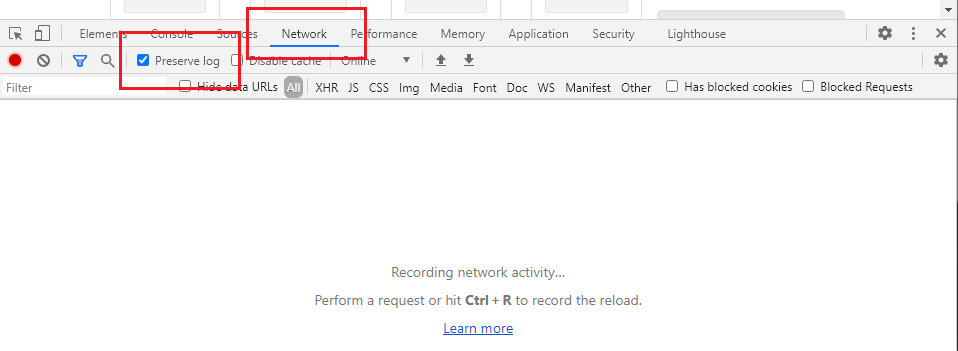
Open Chrome Network panel
Open Chrome and open DevTools: Command+Option+J (Mac) or Control+Shift+J (Windows, Linux, Chrome OS).
Go to the Network panel and check “Preserve Log”:
Browse site and export HAR file
Let’s start our test case!
On the same Chrome tab, enter this address: https://enhancedecommerce.appspot.com/. It is important to use the same tab to record the browsing session.
Click on the “Compton T-Shirt”.
On the Compton T-Shirt product page, click on the “Add To Cart” button.

Export the browsing session into a HAR File: in the Network panel, click on the small “Export HAR…” icon:

Save the HAR file in the same directory you use
for this tutorial. Name it demo_store_add_to_cart.har.
Check if Google Analytics events are OK
Almost done!
You will write a simple Python script to check if the expected events (defined in tracking plan) were fired.
Create a new demo_store_add_to_cart.py Python file.
Note
Use this command at each step to run the file:
python demo_store_add_to_cart.py
First, add these lines to create a TrackingPlan.
import gaunit

tracking_plan = gaunit.TrackingPlan.from_json("tracking_plan.json")
This will import the tracking_plan.json file you wrote ealier.
Have a look at the events now contained in your test case with
get_expected_events():
events = tracking_plan.get_expected_events("demo_store_add_to_cart")
print(events)
# [{"t": "pageview", "dt": "Home"}, ...]
Now, let’s check_har() and print the result.
# get result
r = gaunit.check_har(
   "demo_store_add_to_cart", tracking_plan, har_path="demo_store_add_to_cart.har"
)
print( r.was_successful() )
# True
The was_successful() method is the simplest way to know if the test passed because it gives you a
bool True or False. But you can get more details on the test. For example:
# Checklist of the expected events actually found in HAR ('True' if present)
print( r.checklist_expected_events )
# [True, True, True]

# All GA events actually found in HAR
print ( r.actual_events )
# [{'v': '1', '_v': 'j87', 'a': '1597243964', 't': 'pageview', 'dt': 'Home'}, ..]

# Pretty print the result of the test (and display all events)
r.print_result(display_ok=True)
This last line shall print this in your console:
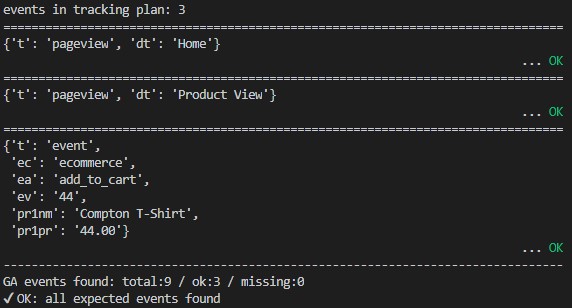
Bravo! You’ve just made your first GAUnit test!
Note
Full source code can be found on Github: GAUnit Getting started sample
Bonus: do the same with command line
Sometimes, it’s better to use command line directly, instead of Python. GAUnit lets you do that:
$ ga check demo_store_add_to_cart.har demo_store_add_to_cart
See Command Line documentation on how to use GAUnit commands. They can be useful for your CI/CD pipelines.